Vehicle Management
Add, configure, and manage your vehicles
Add a New Vehicle
Add New Vehicle
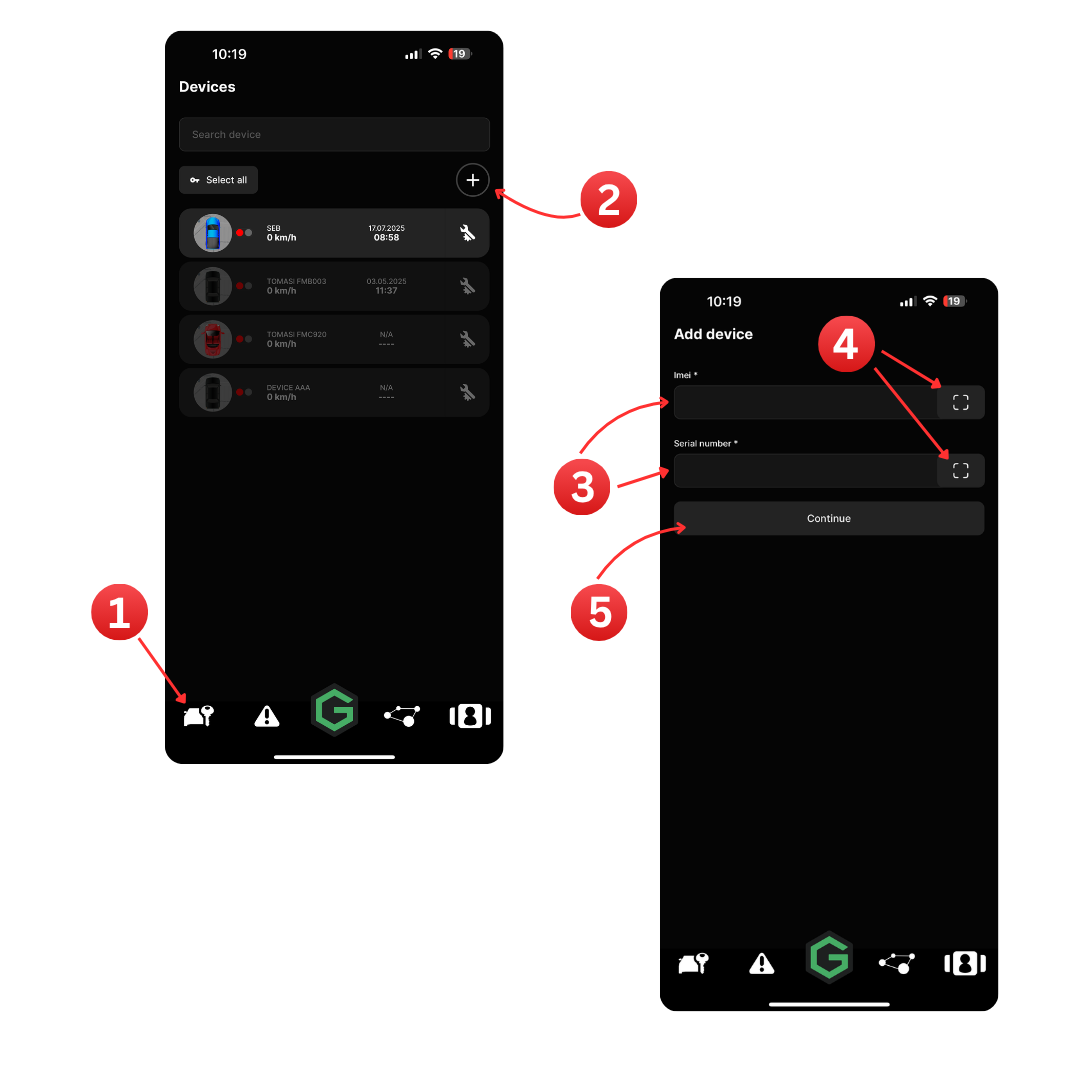
Tap the Devices icon at the bottom of the screen.
Tap the + button to add a new device.
Enter the IMEI and Serial number of your device in the fields provided.
To scan the QR code for IMEI or Serial number, tap the QR code icon next to each field.
Tap Continue to proceed.
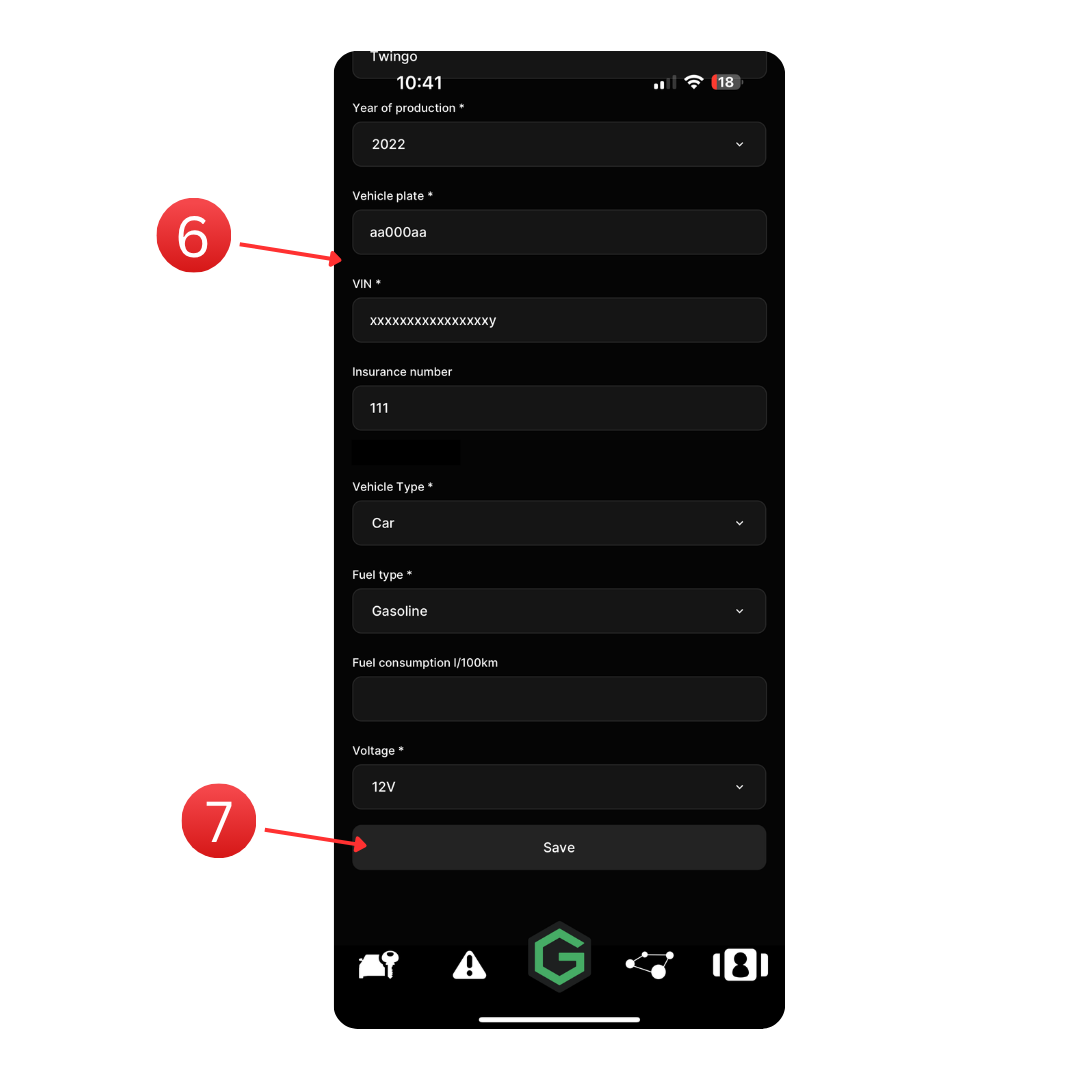
Fill in your vehicle details:
This information will be used to produce the Installation Certificate.
If you are planning to claim an insurance discount (some insurance companies grant a discount on your insurance premium if you have a "GPS Device" installed in your vehicle), make sure to fill in this data accurately.
- Vehicle Brand: Select your vehicle brand from the dropdown menu.
- Vehicle Model: Enter your vehicle model.
- Vehicle Plate: Enter your vehicle plate.
- VIN Number: Enter your vehicle VIN number (17 characters).
- Insurance Number: (if applicable).
- Initial Mileage: Greenbox will count the traveled Km from this value. Visit the Global Settings section of this guide to learn how to switch between the Metric System and Imperial System.
- Vehicle Type: Pick the right selection from the dropdown menu (car, motorcycle, boat, etc.)
- Fuel Type: Select the correct Fuel Type from the dropdown menu (gasoline, diesel, hybrid, electric, etc.)
- Fuel Consumption (l/100Km): Greenbox Pro calculates an estimation of your vehicle consumption. Enter in this field the correct value for your specific vehicle. This value is expressed in Lt/100Km (liter per 100 Km) or mpg (miles per gallon). Visit the Global Settings section of this guide to learn how to switch between the Metric System and Imperial System.
- Power Voltage: Select the appropriate power voltage for your vehicle: 12V or 24V. Important: your device will be configured accordingly with this selection.
Once completed, tap Save to add your vehicle.
Vehicles List
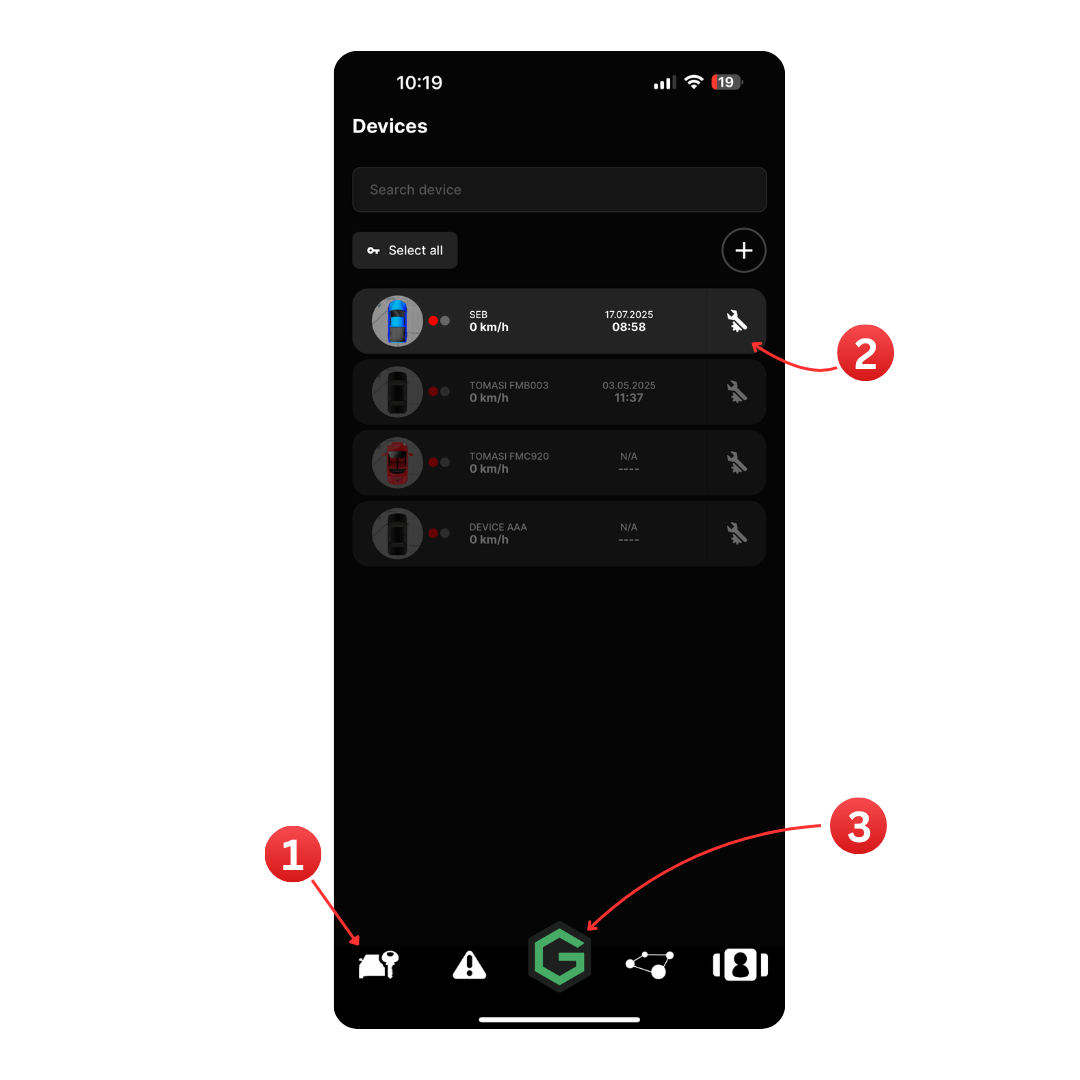
Tap the Devices icon at the bottom of the screen to view your list of registered vehicles.
Each vehicle is displayed with:
Vehicle name or label
Engine Status: On/Off
Current speed (km/h)
Last update timestamp
Link to the vehicle's settings
Tap the Greenbox icon in the center to view your vehicles on the map in real time.
Tip: You can also use the Search bar to quickly find a specific vehicle or tap Select All to manage multiple devices simultaneously.
Icons and Colors
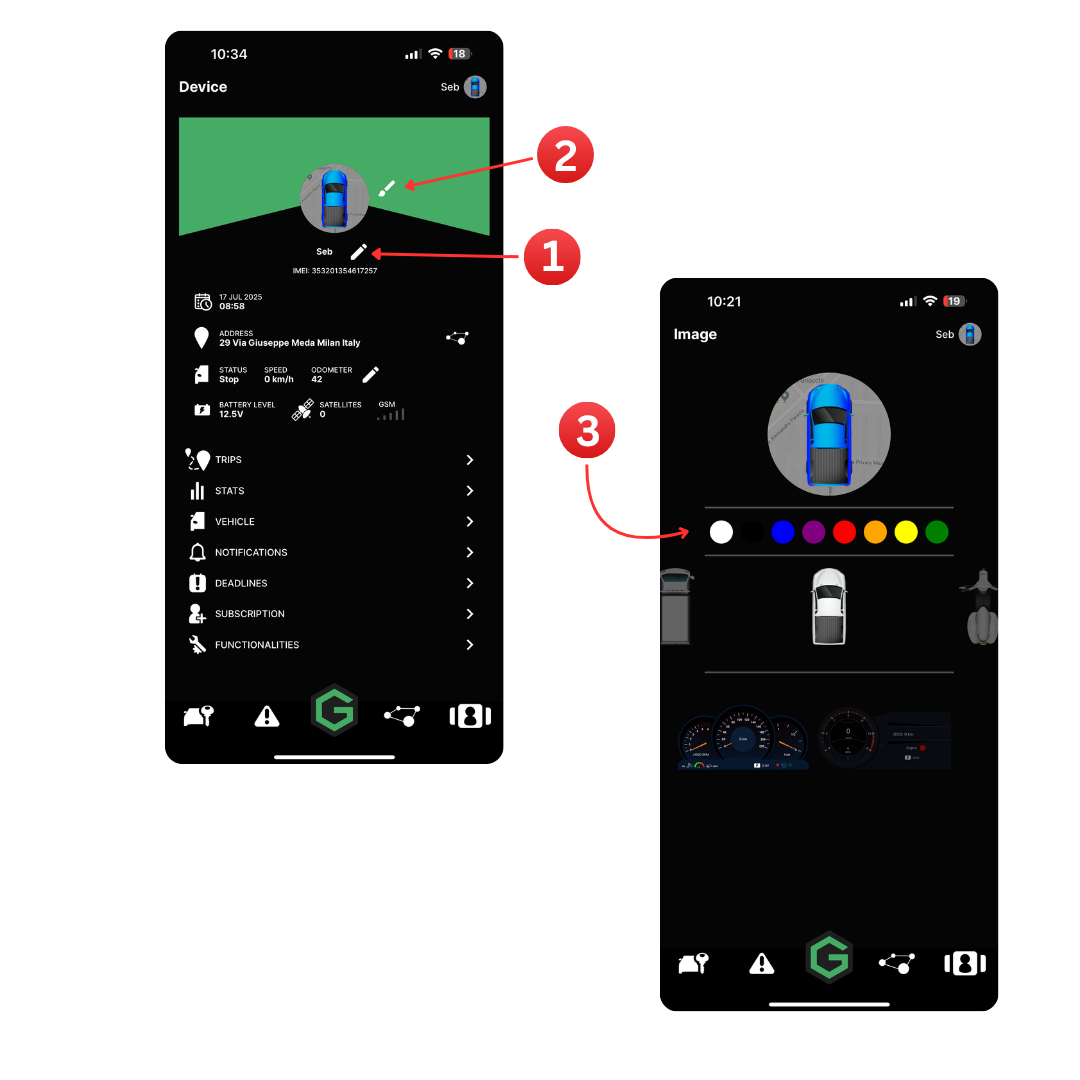
Tap the pencil icon to customize your vehicle’s name.
Tap the pencil icon to customize your vehicle’s icon and color.
Select your preferred icon and color scheme. This will determine how your vehicle appears on the map. You can also choose your preferred dashboard style (car or motorcycle).
Last Known Position
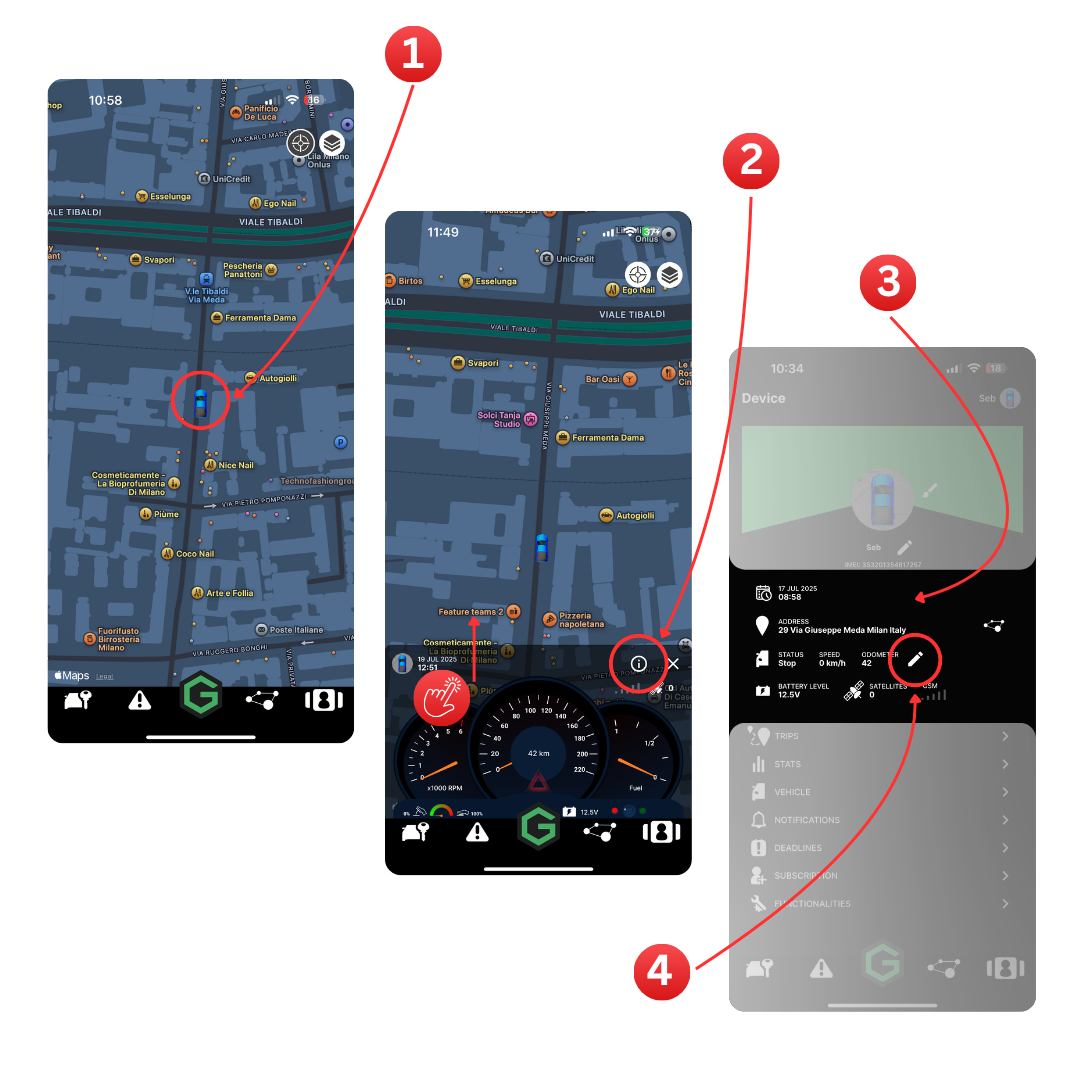
Tap the map icon of your vehicle to view its last known position details.
Tap the (i) icon in the dashboard or swipe up to reveal the vehicle details.
This screen displays the timestamp, coordinates, engine status (on/off), current speed, odometer reading, battery level, number of satellites in view, and GSM signal strength.
To edit the odometer reading, tap the pencil icon next to the mileage (if needed).
Tip: Manually adjust the mileage to keep it aligned with your vehicle's actual odometer reading.
Quick POI
Quick POI (Point of Interest)
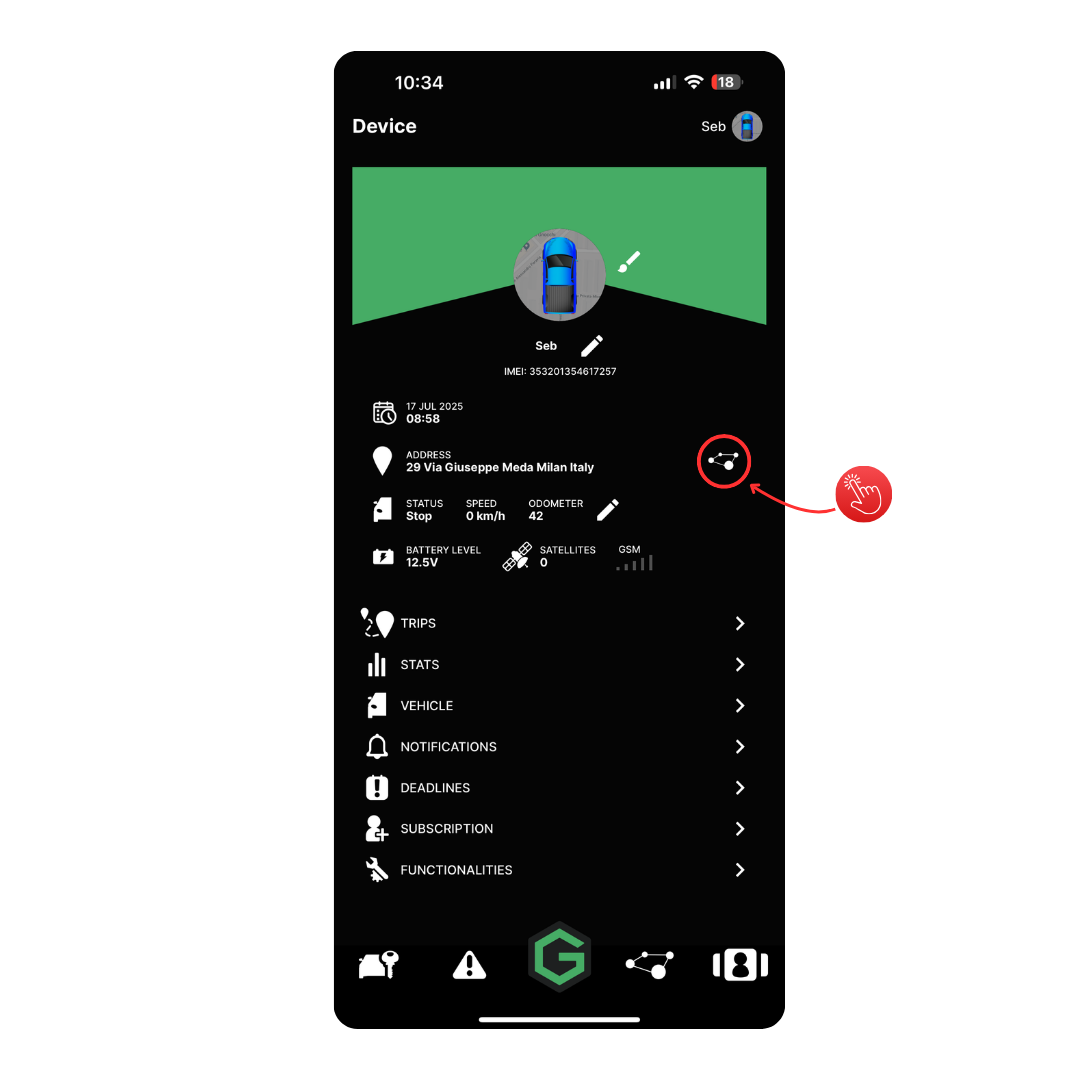
On the Device Details screen, tap the Quick POI icon to start.
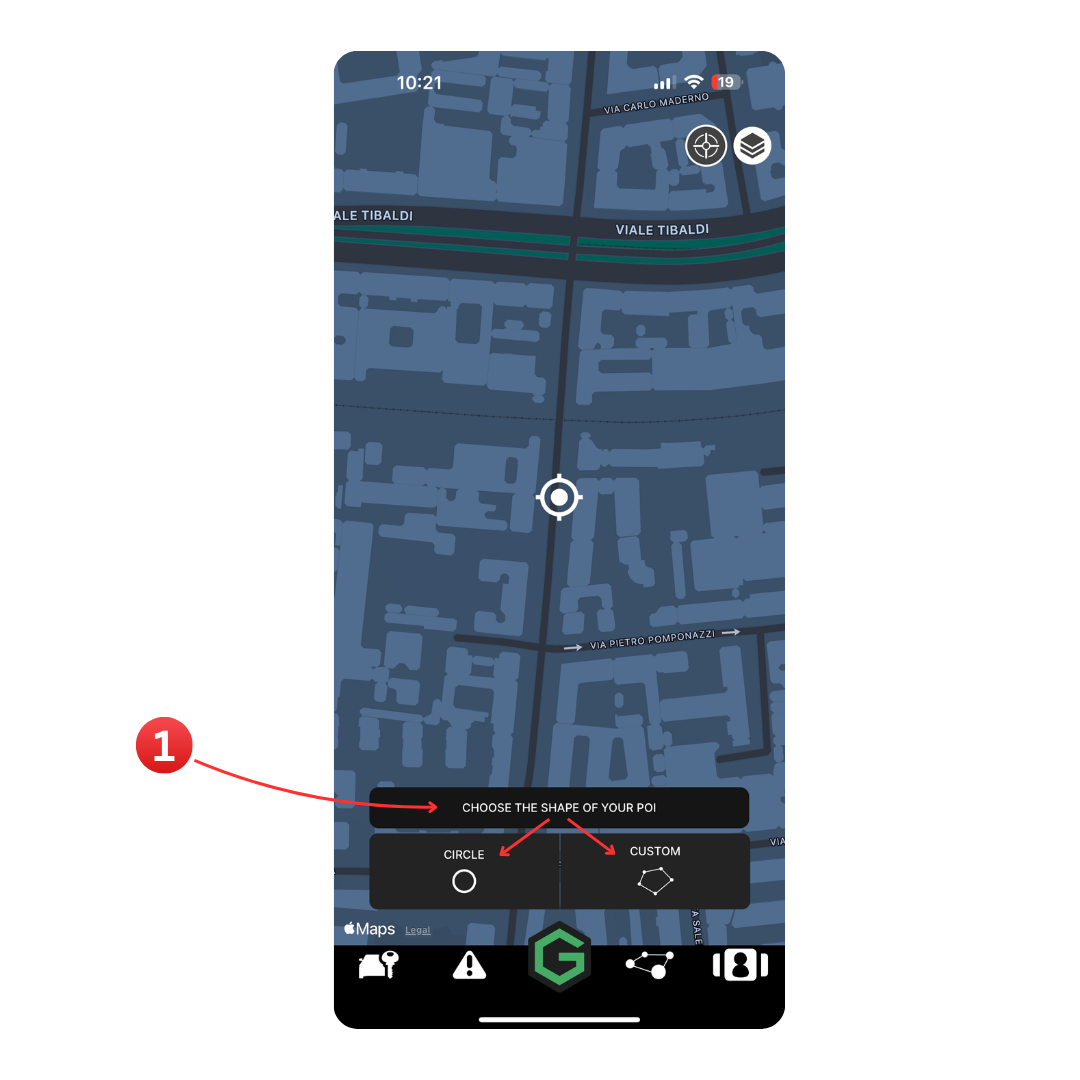
Choose the shape of your POI:
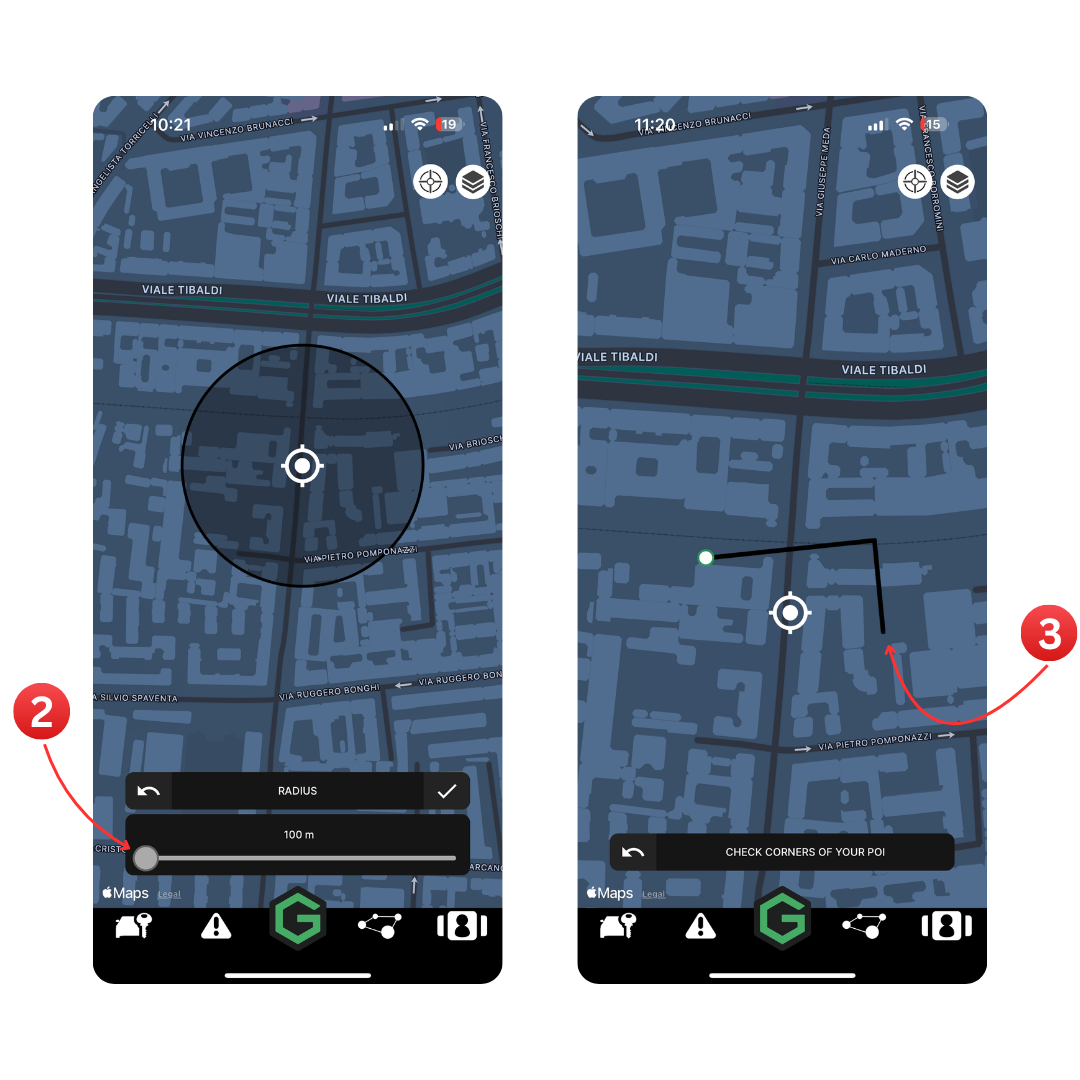
Circle: Define a radius.
Custom: Draw your own area by tapping to set corners.
Adjust the radius slider for a circle or fine-tune the custom shape.
Set when the POI should trigger an event:
On Enter: When a vehicle enters the area.
On Exit: When a vehicle leaves the area.
Both: For entering and exiting (see arrow 4 in image 4).
Tap Select Devices to choose which vehicles the POI applies to.
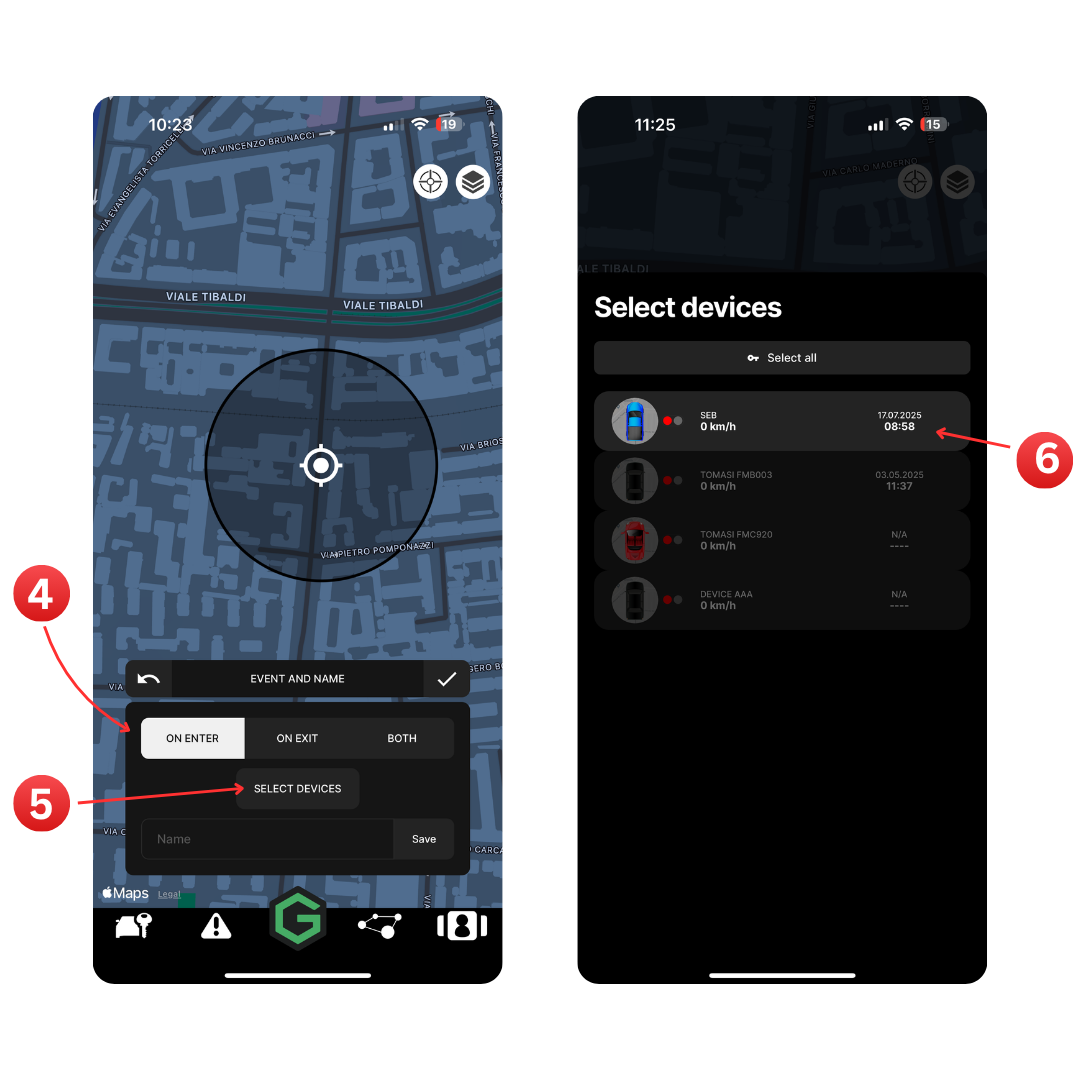
Choose the devices from the list that will use this POI.
Enter a name for your POI and tap Save to activate it.
Your POI is now set and will generate alerts based on your chosen events.